Picture Gallery 1-Developing the Idea
January-April 2005
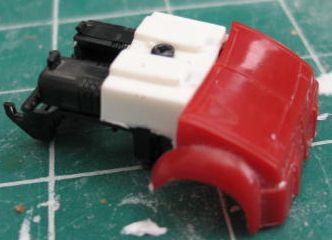
Before I pitched the idea to Greg and Richard, I came up with a really rough kitbash so that I could email them pictures of what I was intending to do. All of our correspondence was via the internet because while they were located in Washington I was living on the other side of the world.
My original intention was to make screw on body parts so that all we had to do was take existing Cliffjumpers or Bumblebees and replace their body panels with our Jazz body parts. That way all I'd really have to do is fabricate new heads, modified feet, and a spoiler. I tend to be really lazy at the beginning of a project and I try to engineer a way to get the job accomplished with as little work as possible on my part. I figure more work isn't necessarily better if I can take shortcuts, so I planned on using existing toys as the foundation for the Jazzes.
I imagined I would only be producing 4 piece body modification kits. Ultimately the success of this idea would hinge on our ability to secure a bunch of Cliffjumper and Bumblebee keychains. Unfortunately those were getting scarce in late 2004. I didn't know that at the outset so my initial kitbash was made with a Cliffjumper keychain I had lying around and some parts I sculpted out of Sculpey brand modeling clay. The head of the kitbash was made from parts off an old Jazz junker I had. I cut the face off of the Jazz and it fit perfectly on the headplate of the Cliffjumper keychain once I took Cliffjumper's face off. I thought it was strange how many of the 1984 deluxe Autobot cars have heads that are in the same scale as the minicars from that year. This was nice because it meant I didn't have to sculpt a new head from scratch.
Once I had the kitbash done, I took some pictures and did some simple photo manipulation to make it look white with blue stripes. This marked the first time I ever used digital trickery to help me envision an idea. Last year when I made the Cybcon Bumblebees I emailed pictures of the really rough prototype to the guys and Zobovor digitally colored it so I could have an idea what the final product would look like. I never thought of trying that before and I liked the idea so much that I started photo manipulating pictures of the early prototypes from the start of this project.
I figured people wouldn't like a minibot without wheels, so I kept them on the Cliffjumper kitbash, but Greg felt it would be better to go all the way and cover up the toy's wheels or eliminate them all together to be more faithful to the vehicle mode as it was depicted in the cartoon. At that point I began realizing it would be better to totally replace all of the body panels with parts of my own design.
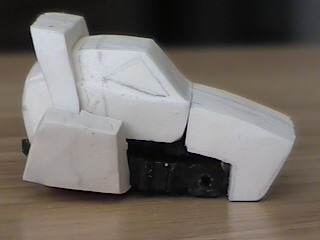
I started thinking that just changing out the feet and head wouldn't really do justice to the idea. So the idea evolved and I began designing an entirely new outer body shell that would fit on an existing minibot chassis. I liked that idea a lot. If I could pull that off I'd be able to create all sorts of new minibots without having to engineer my own transforms. I went back to the drawing board and came up with a bunch of drawings of proposed looks for the new outer body. They varied slightly in the slope of the hood and other tiny details. I emailed them to the guys and we all agreed on on which shape we liked . I got busy sculpting the first prototype out of clay based on the design we all liked best.

I used the Cliffjumper keychain as a size reference to keep the clay prototype I was sculpting in the correct scale. When I started out I sculpted the front end as one piece so the feet would be as symmertical as possible. I felt attaining symmetry was a big problem with the Bumblebees so on this project I wanted to make sure to get everything as proportionate as possible. Once I was happy with the front I cut it in half so the feet would seperate. When I sculpt body parts I start out with blocks of clay in the approximate size I need them, then I draw the shape I want to carve in pencil. I take my Dremel to the clay and get as close as I can to the shape I want. Sculpey is pretty delicate and although I've gotten pretty good at shaping it with my rotary tool and sculpting knives, I still can't get the exact shape I want for fear of the clay breaking apart. So once I have my approximate shape I make rubber molds of it and then make resin castings. These initial castings are what I use for further sculpting and finalizing the shape I want. Resin can take a lot more abuse than Sculpey can.
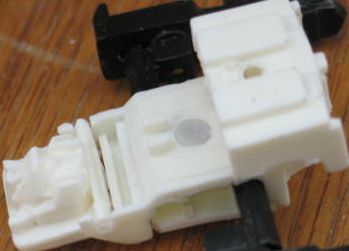
By mid February it was becoming apparent that tracking down 15-20 Cliffjumpers and Bumblebees to provide the donor parts for the chassis was going to be beyond our budget and ability. So I had to duplicate the minibots' inner transforming mechanisms out of resin. It would be pretty challenging. I never copied pieces of such complexity as the inner workings of minibots before. I learned that there are very specific tolerances for the thicknesses of the parts. You can't just make crappy copies and expect everything to work and hold together. It was really difficult but I ended up making some good molds. I was able to duplicate every part I needed and the resin was strong enough to handle the stresses of transformation. So I told the guys we wouldn't need any donor parts and I continued on with the project.

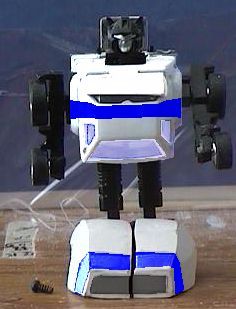
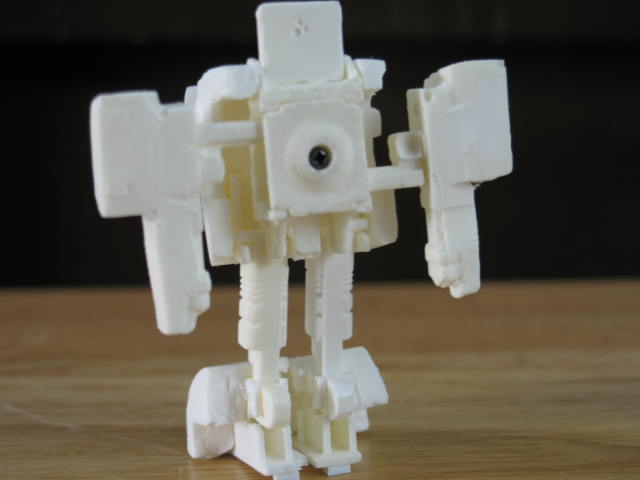
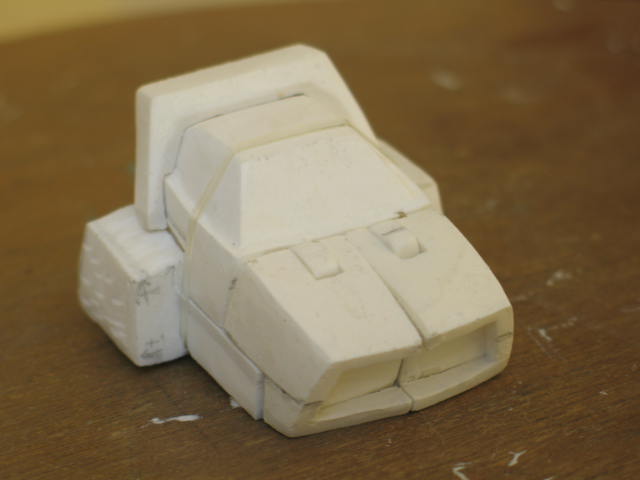
Pictured here next to Tailgate is the resin prototype I made from the first all clay sculpt proto. At this point the inner mechanisms weren't complete so I was using Bumblebee insides to hang the parts on and I hadn't finalized the arm sculpt. The whole thing still had lots of refining left. There would still be a ton of sculpting to do to get everything to match up right. But it was nice to get this far because it was the first time I could put most of the parts together and see I was getting somewhere.
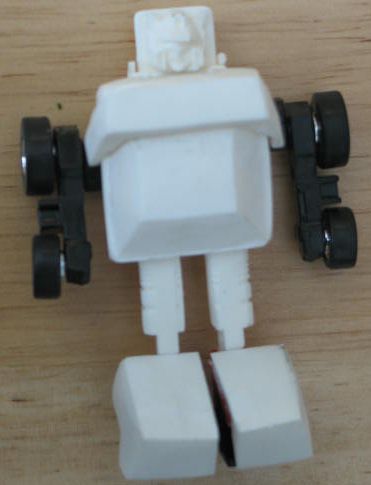


Click on the thumbnails above to get larger pictures. You can see how I was experimenting with the shape of the quarter panels and other features. You can also see how the feet at this point were just shells that fit over the existing feet. At this point I was still designing the feet so that they would use the same transform as the toy. That would eventually prove to be too difficult to duplicate in resin. The plastic used in toy manufacturing is pretty strong even at very thin thicknesses. The resin I used was never meant for making transforming figures. So I eventually scrapped that idea and redesigned the feet so the resin wouldn't break during transformation.
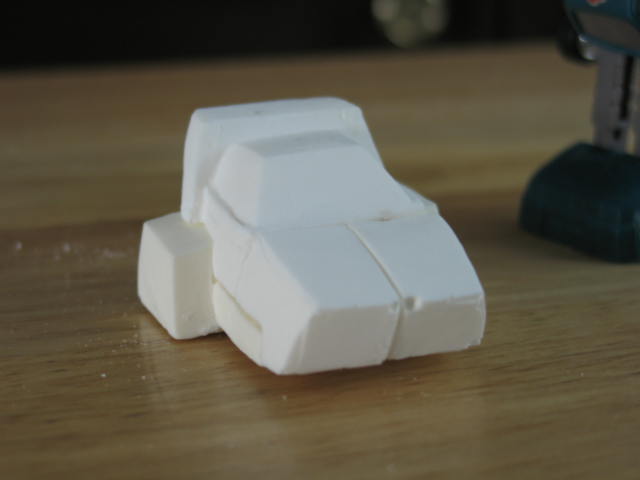

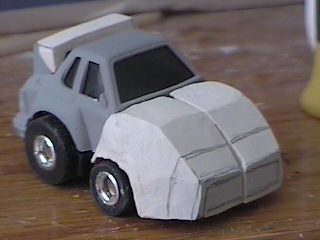
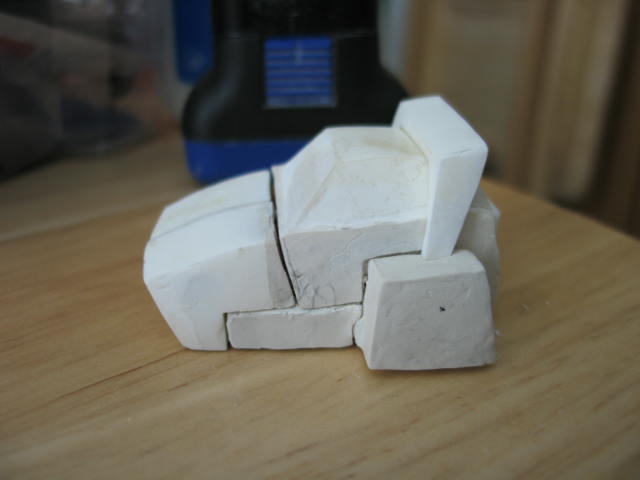
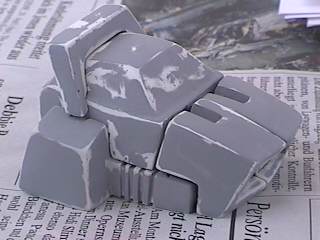
The pictures above are of the testshot I sent Richard in late March. I made castings from the first molds, assembled them into one complete unit and sent it off to him. I did that so he could begin creating the packaging well in advance of the convention. The packaging testshot was really rough but it would end up having the approximate dimensions of the finished product and that gives a good idea of how large the packaging should be. You can see how early in the sculpt this is by how ugly it is. There are pinholes, alignment problems, imperfections everywhere and the arm and feet sculpts aren't finished. I hate making testshots because they're unfinished sculpts and they suck so badly. I don't like having early copies of my projects floating around, but it's a necessary part of the process.

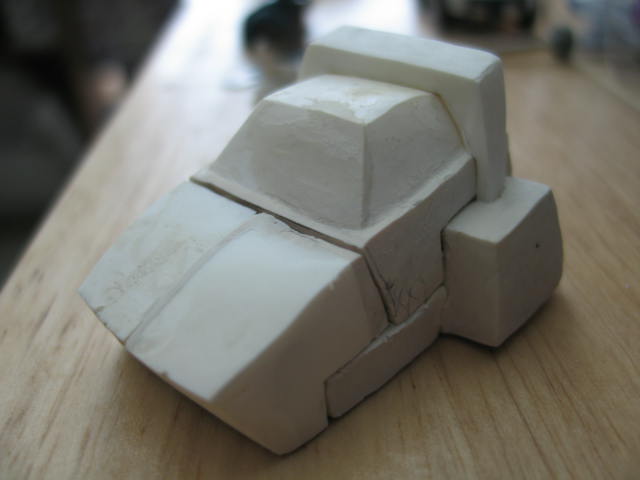
Now we're getting somewhere! Here's the resin prototype in mid April after a bit of additional sculpting. I like to use Sculpey in this stage for areas that need shaping or filling. This resin/Sculpey prototype would go on to be the one I made the master molds from for the final production models.

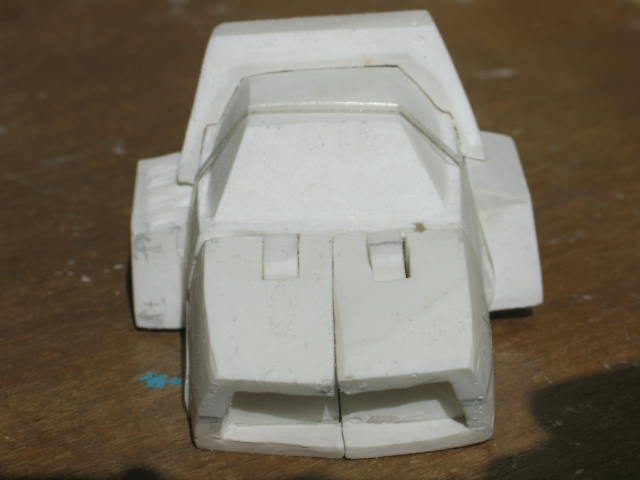
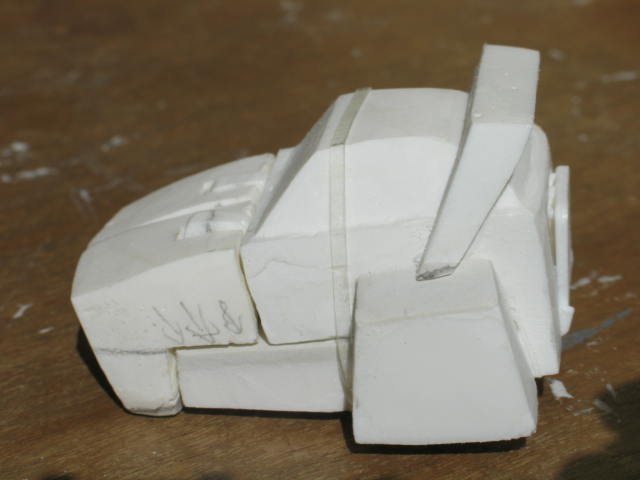
Here we are a bit later in the sculpting process around late April. Things were going good until I started freaking out because I realized that duplicating the foot transform would not work due to the weakness of the resin. I needed to reengineer the transform a bit to play of the resin's strengths. For some reason my mind shut down and I couldn't figure out a work around for this problem. So after some desperate rantings to the guys, "Joebot" aka "G2 Necrotron" aka "the guy who says he can't engineer anything" helped me out big time. He came up with the idea of using pins drilled into the feet that the legs would rotate on. It's essentially the same transform I used on the 2004 Bumblebees. Why I was blanking on Jazz when I used that idea before on Bumblebee I have no clue. But Joe saved the day with the suggestion and I was able to go on. The pictures above show the re-engineered feet. I also had to slightly modify the legs to accomodate the transform and consequently they wouldn't end up being straight copies of the minibot legs as I originally envisioned. I also scalloped out the grill area and I would later carve ridges in the arms. All that was left to do was prime these parts and then make the final molds off them.
Picture Gallery 2-Production-Resin casting, dyeing, parts fitting, priming, painting, and decal applying in style!
Picture Gallery 3-Finished!-A look at the finished products and the variations thereof.