- Ingredients
-
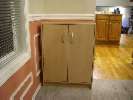
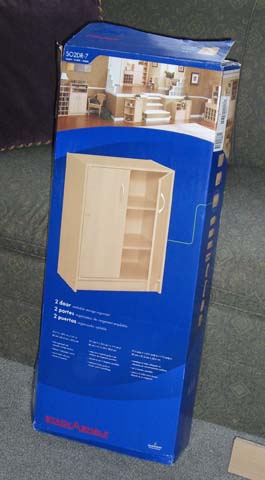
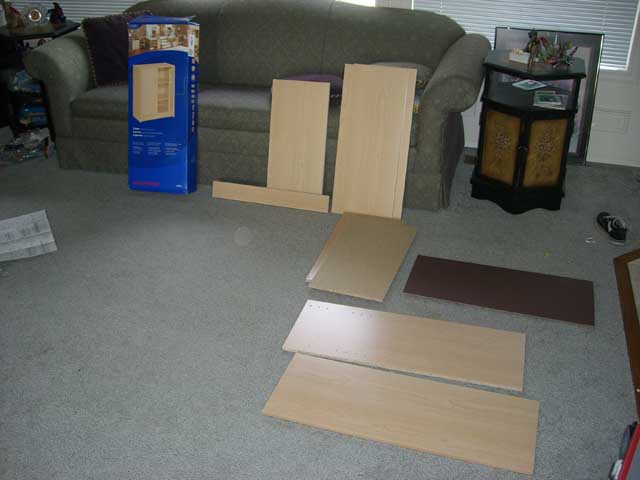
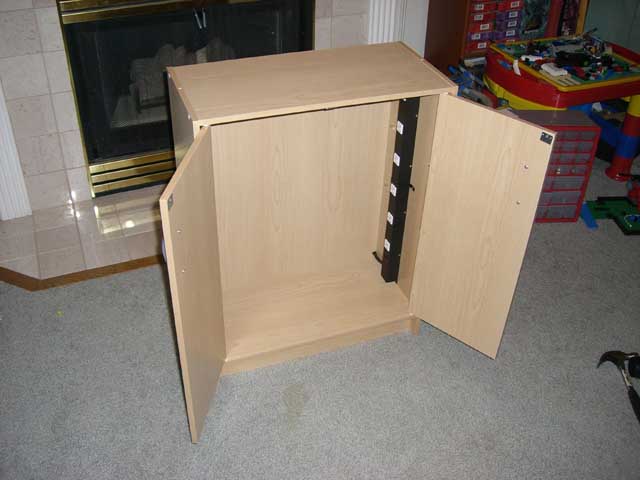
- A cabinet. Ideally, it should match your decor somewhat, have doors and adjustable shelves, and enough room for all your gadgets that you want to hide away while charging. This is the one I got from Fred Meyer.
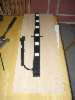
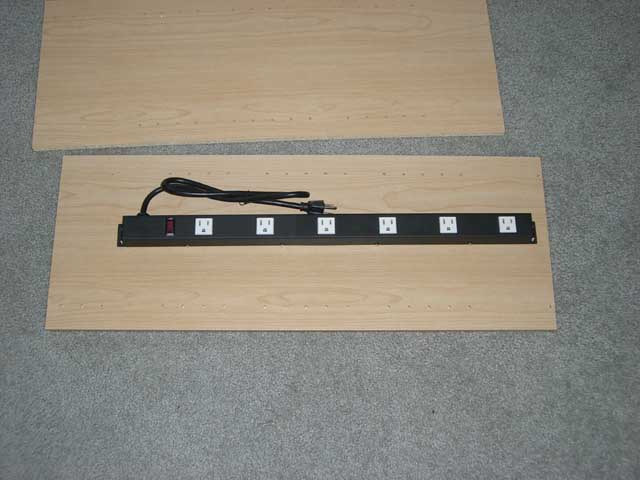
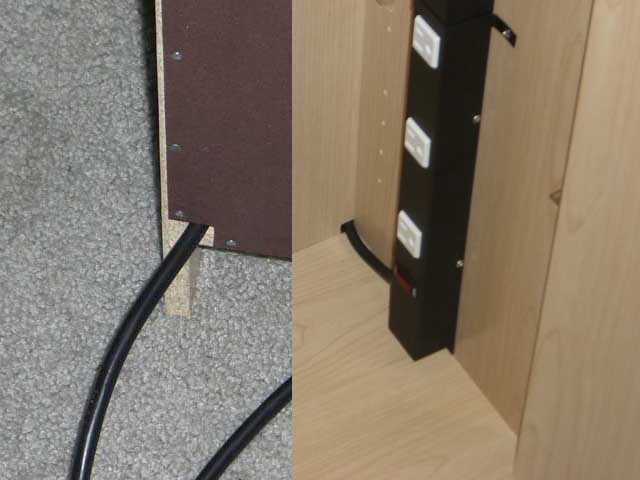
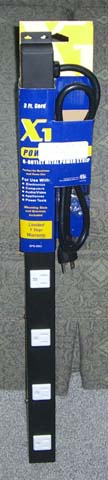
- A power strip. I searched a while for the perfect one. It needed to have the outlets far enough apart to accommodate wall-warts, but also be short enough to fit completely inside the cabinet. You'll want to be sure of the size limitations based on the interior dimensions of your cabinet, of course. The exact one I got was this one from Fry's.
After you've verified that the power strip will fit inside your cabinet somewhere, it's time to put things together. It's not a terribly hard thing to figure out on your own, so by all means, go snag a cabinet and a power strip and wing it! If you want to do yours just like mine, and need more guidance than a manly shove toward the hardware store, just follow these easy steps.
- Read the instructions
- I know it's hard sometimes, but your cabinet may be different than mine, so you'll want to be fully aware of the sequence of assembly and where all the parts are going BEFORE you start screwing things on. Without any hardware involved, I made sure that my power strip would have plenty of room on all sides so that there wouldn't be any problem assembling the cabinet. My original idea had the strip in the back of the side, but after seeing where the peg holes for the shelves are, and thinking about how some wall warts might need to be turned around, I decided to put the strip right in the middle of the side. You might need to choose a different location as well.
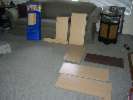
- Prepare your work area
- Don't worry, the building is next. Just be sure you have plenty of clean space to work on this. You'll be needing to lay the cabinet down somewhere most likely, not to mention keeping track of all the pieces as you're doing your modding and/or assembly.
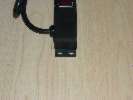
- Install the power strip
- Once you know where you're going to put the power strip, and have familiarized yourself with the instructions to know if it's ok to install on one of the sides right away, it's time to put driver to screw and attach it!
- If you decided to put the strip in the middle of one side like me, measure the depth of the shelves.
- Mark the center of the shelf on the end that you are going to have the power strip. This is where the notch in the shelf for the strip will be.
- Measure the width of the power strip and add a little for clearance. Mine worked out nicely at 2".
- Mark the shelf where the strip will go. In this case, 1" to either side of the center line.
- Put the shelf down on the side where you'll be attaching the power strip, and line it up the same as it would be if it were on the pegs after being assembled. For my cabinet, the back of the shelf is flush with the back of the cabinet side, because the doors are flush with the face of the cabinet when closed, so the shelves are behind the face of the cabinet enough for the doors to be there.
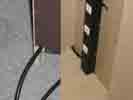
- Mark the side of the cabinet near the top and bottom of where the power strip will go, using the 2" notch marks you made on the shelf earlier. We'll use this to make sure our power strip lines up with the shelf notches when we're done.
- Line up your power strip in the center of your markings on the side of the cabinet.
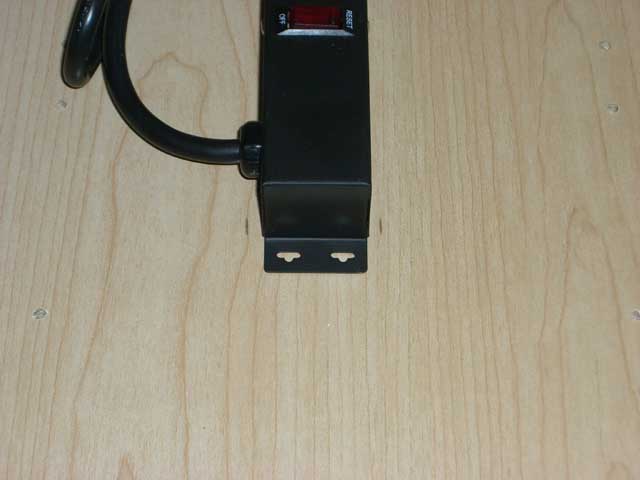
- Mark where the mounting holes for the power strip are so that you can make sure things don't go out of whack when you start screwing it on.
- SCREW IT! A power drill is really handy here, but you can do it with elbow grease as well. Mount the power strip according to whatever mounting holes and/or straps/retainers it comes with.
- Assemble your cabinet... mostly
- Following the instructions for your cabinet, carefully assemble it. Remember, the side with the power strip attached will be off balance and harder to hold in place. Getting a friend to help is a good idea, or a few dead trees you have laying around the house. Dictionary and Encyclopedia Dead Trees are good choices.
- Don't attach the back yet!
- Before you nail on the backing for your cabinet, figure out where the power strip cord will be exiting the back of the cabinet, and take a notch out of the backing piece. For my cabinet, it was just a heavy piece of cardboard with wood print on one side. All I needed was a pair of heavy scissors to cut a piece out of the bottom corner nearest the power strip cord.
- Now attach the back
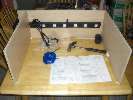
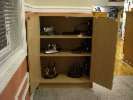
- With your power strip's cord hanging out the back of the cabinet, line up and nail down the cabinet's backing board. At this point, you have a shelfless cabinet with a power strip on one inside wall. I guess you could stop here if all your gadgets are really tall and thin, but most of mine were short and small, so I modded the shelves, too.
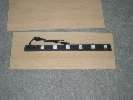
- Mod the shelves
- This is where your saw and rudimentary woodworking skillz (with a z!) come into play.
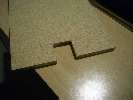
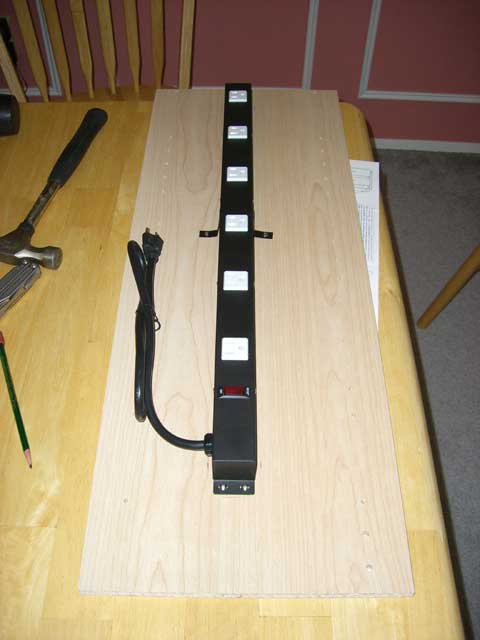
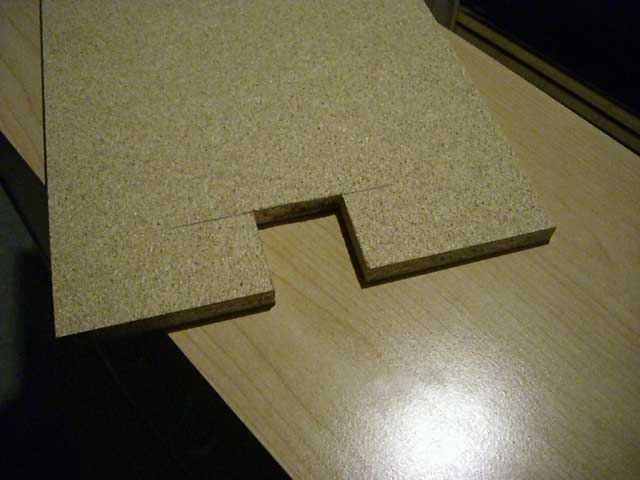
- Figure out how "tall" your power strip is, that is, how far into the shelf you need to make your notch. As it turns out for mine, 2" cleared it quite nicely, so my shelves each have a 2"x2" notch in the center of one end.
- Mark the notch that you will be taking out of your shelf. Heavy pencil lines should do the trick. Make sure you mark the CORRECT end of your shelf. These cheap cabinets usually only laminate the top and front, the side you usually see, so make sure you get the orientation right, or else you'll have the pressed wood showing, or have to make notches on both ends.
- Cut it! In my case, I used a small Japanese pull saw I had from my model making days in Architecture school at UW. You could use a coping saw, a keyhole saw, or whatever. I wouldn't recommend a full sized hand saw for such a small job, but hey, whatever you got! For this step, just cut the two SIDES of the notch, leaving the end cut alone.
- With the two sides of the notch cut, take a metal ruler and a heavy utility knife, and score the top AND bottom of the shelf where the end of the notch is. Score it as deep as you can. If you had a coping saw, you could have just made the corner and cut the whole notch out, but for those with a flat saw that won't do corners, you'll like this next step.
- Now that the two sides of the notch are cut, and the end is scored nice and deep on both the top and bottom faces of the shelf, put your shelf on a table or block so that the notch end hangs over the table or block or whatever.
- Take a hammer, doesn't matter what kind as long as it can fit completely inside the width of the notch. Hold your shelf down firmly, take careful aim, and WHACK hard right in the middle of that notch piece you're trying to get rid of. It should just snap off nicely.
- Trim away any splintered pressed wood from the end of the notch where it wasn't actually cut. The scoring on the top and bottom of the shelf should have resulted in a nice clean edge in those areas. The center doesn't matter, so we just clean it up and leave it at that.
- Install your shelves
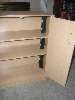
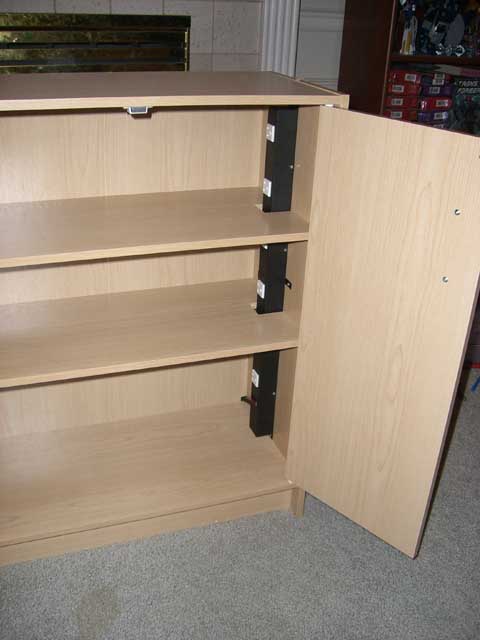
- Install the shelf pegs and shelves such that you have clearance for the plugs to be used in each area. In my case, I have two outlets per shelf, and the shelves provide a variety of heights to work with, so my smaller/shorter gadgets can go on the smaller shelf, and the bigger/taller ones can go on the bottom.
- Plug in your stuff
- Yeah, you need this step, I'm sure. Gather up your gadgets and their cradles, cables, and adapters, and plug them in! Show your wife how nifty it is, and point out where her cell phone charger is located from now on. ;-)
As you can see, I still have plenty of room for more gadget charging in there. Each shelf could easily have three ore more devices on it depending on size. I'll probably be adding more soon, as I find another nook in the house with a lone gadget on the floor next to an outlet. ;-) I hope you enjoyed my how-to, and I hope you find this easy and useful enough to make your own. Thanks!
-Greg
|


|


